

Few days ago, late in the night, as I was lying on a bed with night stand lamp turned on, I felt too lazy to get up and reach to turn the light off… If only there was an easier way to turn electronic devices on or off. Maybe by clapping?
They say all brilliant inventions are born from necessity! 🙂
It’s not a new idea (and looks like there are products available online, even of the “as seen on TV” kind), but it’s just more fun to solve problems by yourself, and learn something along the way.
Armed with an Arduino, piezo element (which can be not only used as a buzzer, but also to detect vibrations) and a relay, I got to work.
Update [Dec 2016]: this approach has now been replaced by a combination of Google Home and Phillips Hue light bulbs 🙂
Piezo element
It needs to be a real piezo-element, and not a simple “buzzer”, in order for us to be able to use it as an input (to detect vibrations). The ones provided in Arduino starter kits are usually the right ones. And if you need to buy it on Amazon, be sure to check the product description and comments. I had one handy…
Relay
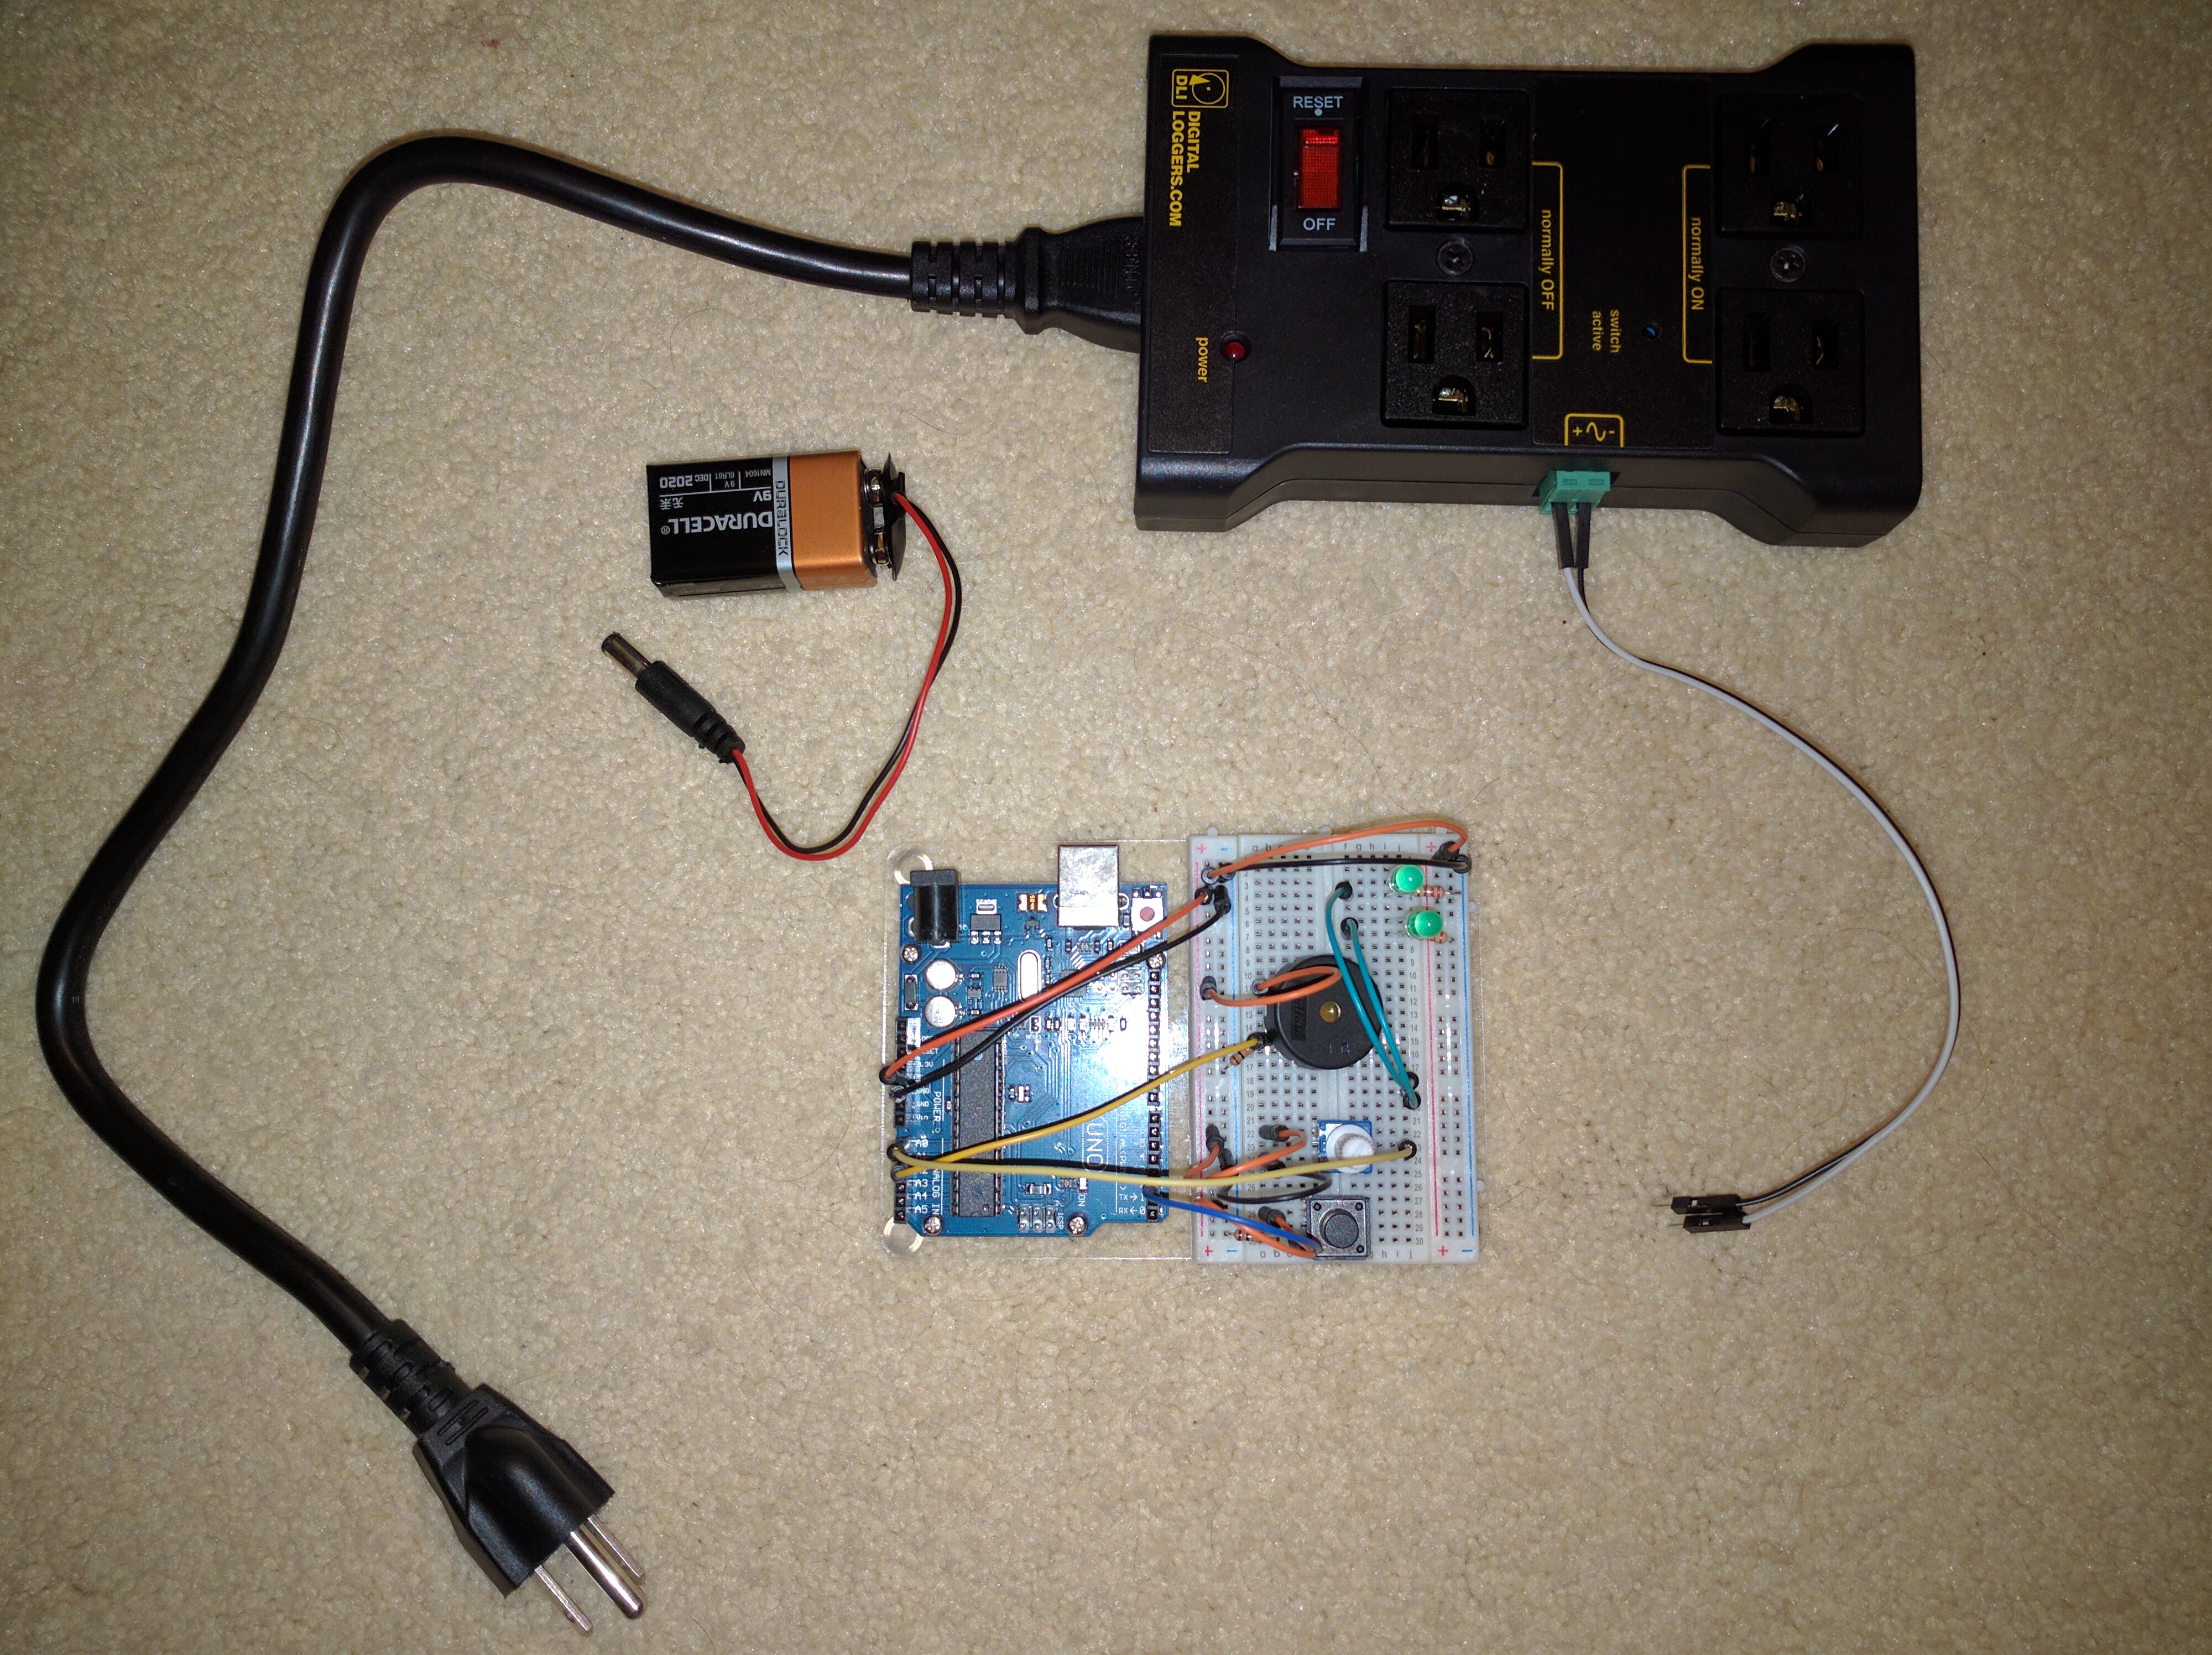
Now, the important piece: to turn the desired device on or off, you can use a relay (make sure to check the rating, to be sure it can handle the voltage/load!), but since playing with higher voltage doesn’t sound like a whole lot of fun, I decided to use one of the available power switches. There are various solutions available for home automation and IoT – I ended up choosing one made by Digital Loggers (http://www.digital-loggers.com/). I got mine directly on Amazon.
It’s a great power relay (has 2 outlets normally open, and 2 outlets normally closed), with just couple improvements I’d love to see in the next version: one always active outlet (to allow for powering the controlling device, or as a pass-through), and built in 5V port (also always active) to enable powering of i.e. Arduino 🙂 Those shortcomings can be easily resolved with additional extension cord (or a 9V battery for Arduino for quick test), but it would make for much more universal package.
Software
I started by seeing how do the vibrations created by clapping behave. It’s important to know where you want the piezo to be mounted first, so you can then fine-tune your algorithm if needed. For measuring, just output the value read from analog pin on Arduino, and add delay(1) in your loop to have manageable amount of data to work with. Maybe also add a threshold value, below which you’ll ignore it altogether.
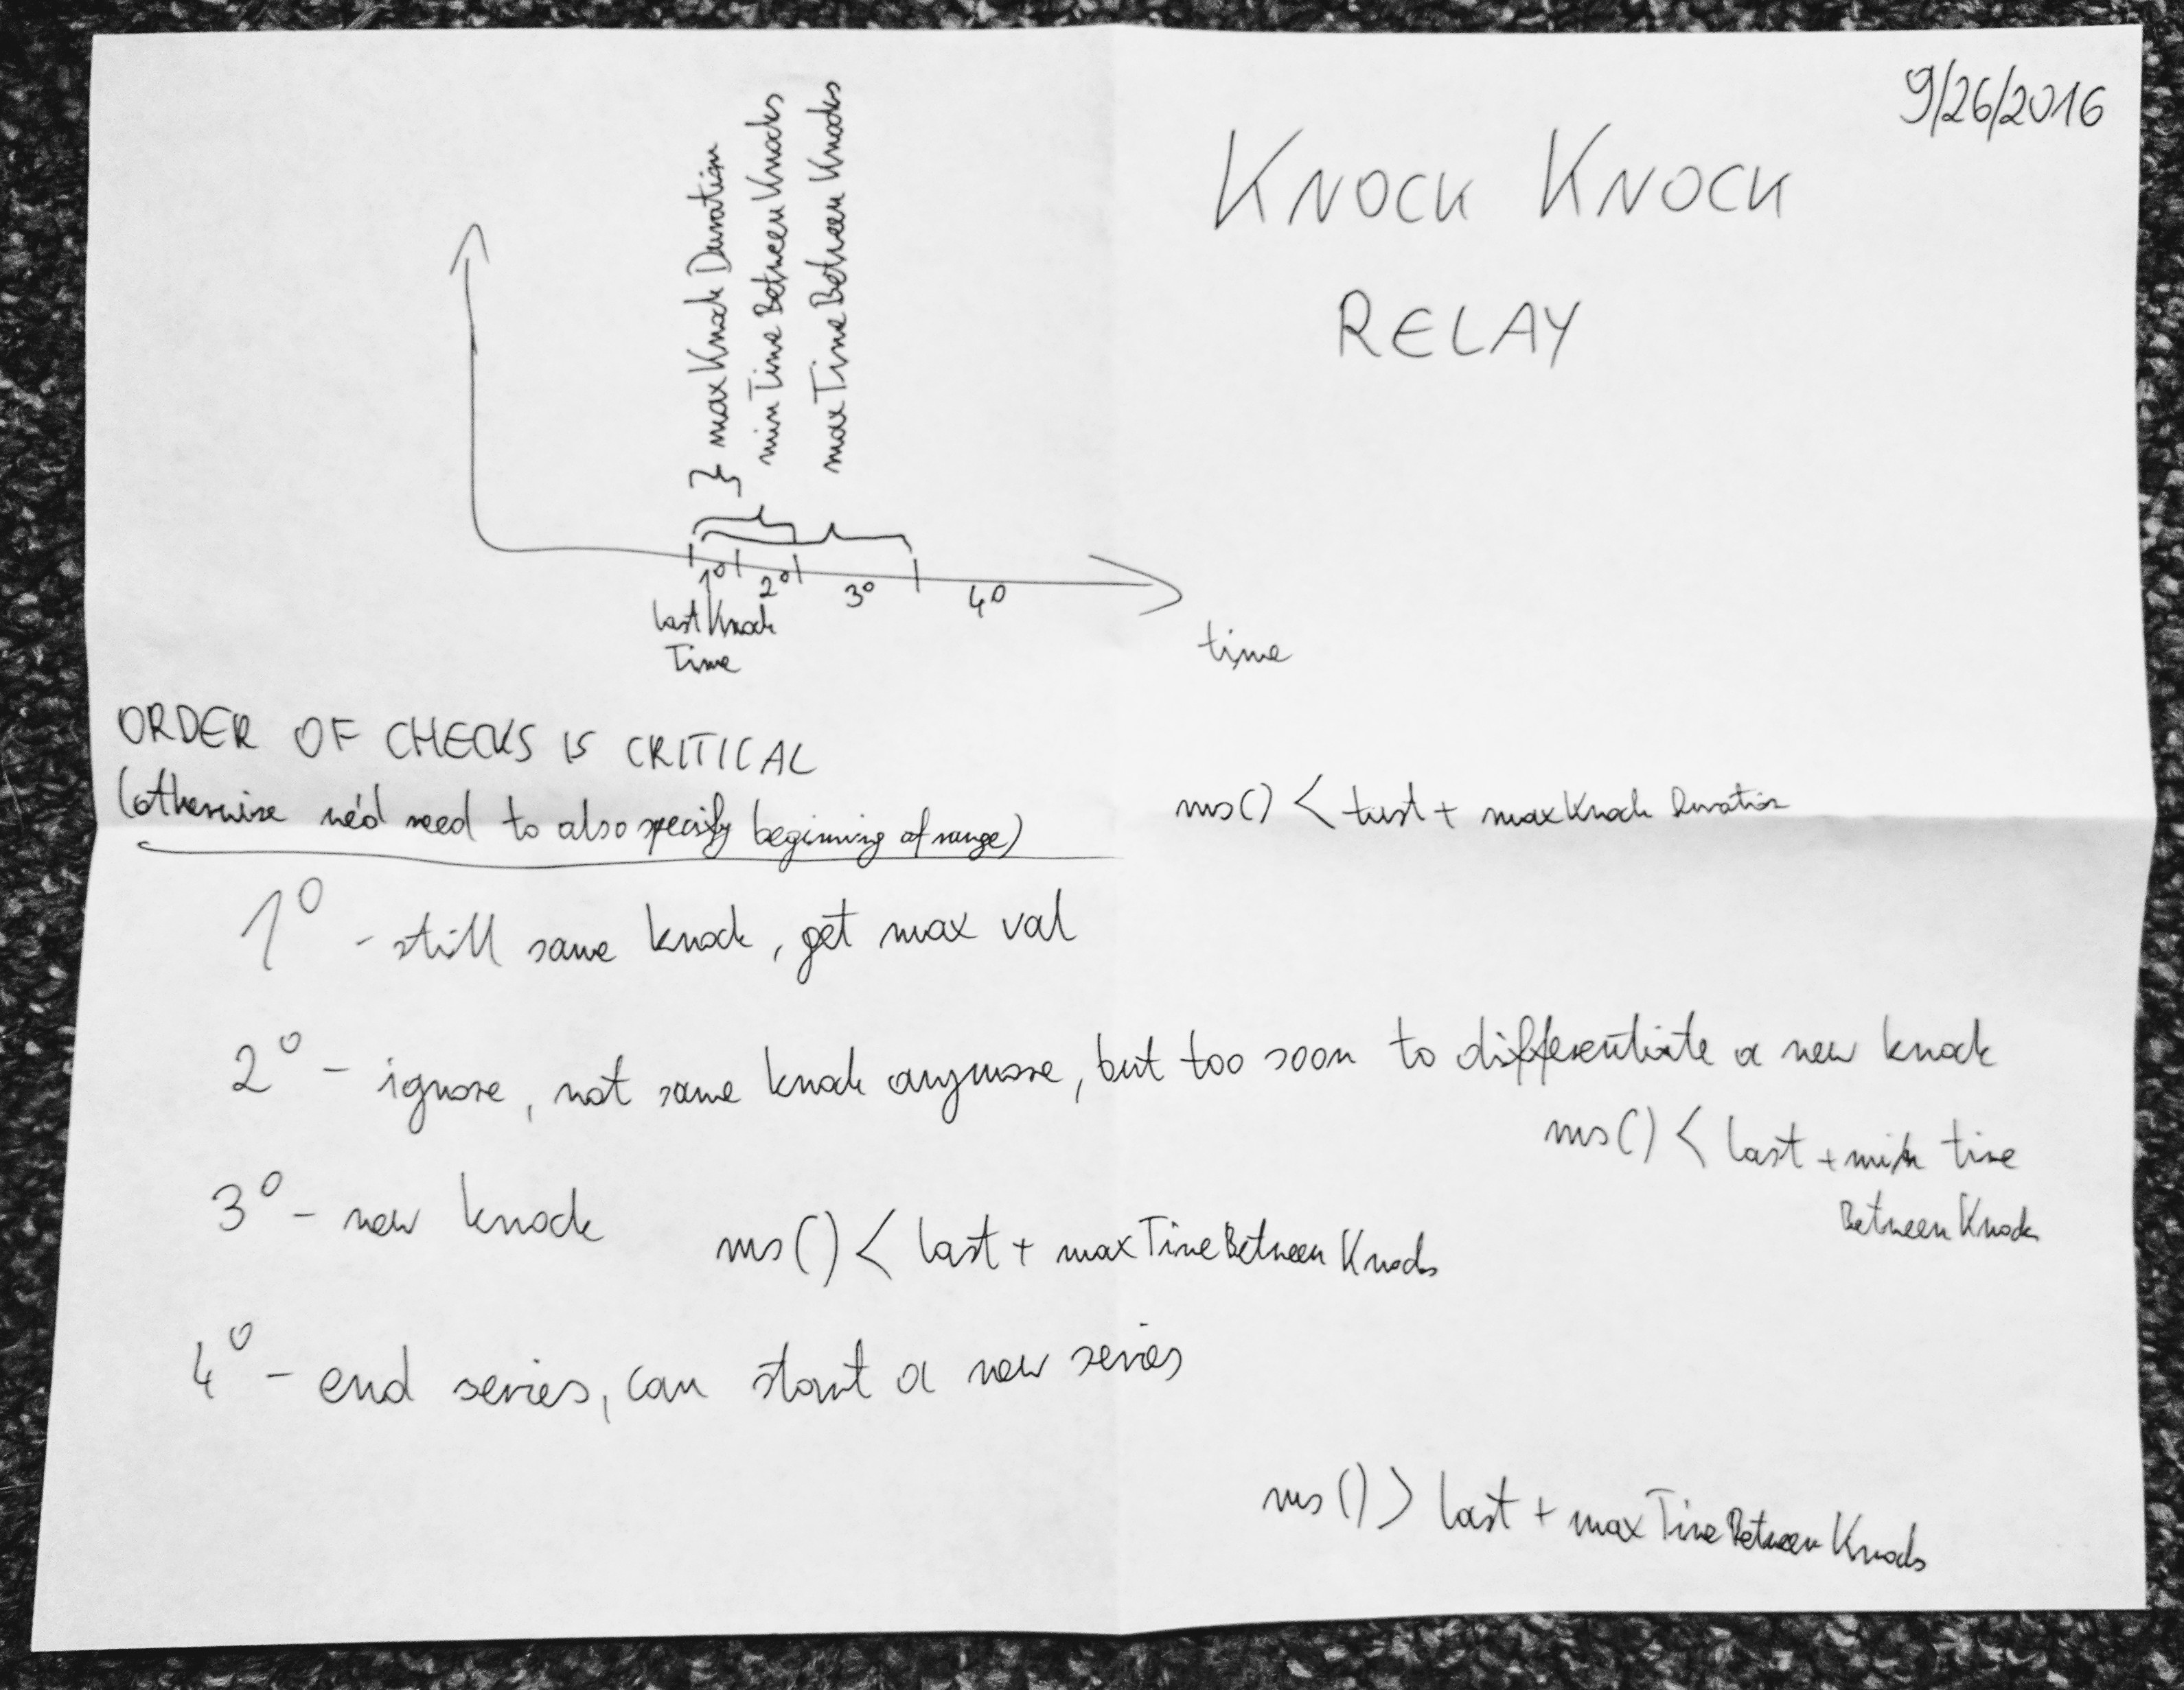
Then decide on timings – how long can a single vibration last at the most, what’s the minimum time between vibrations for them to be counted as a single series (to be able to react differently to 1, 2, 3, … claps), what’s the cool-off time after last vibration after which we end the sequence.
I sketched this small helper chart when writing the code to keep in mind the different intervals:
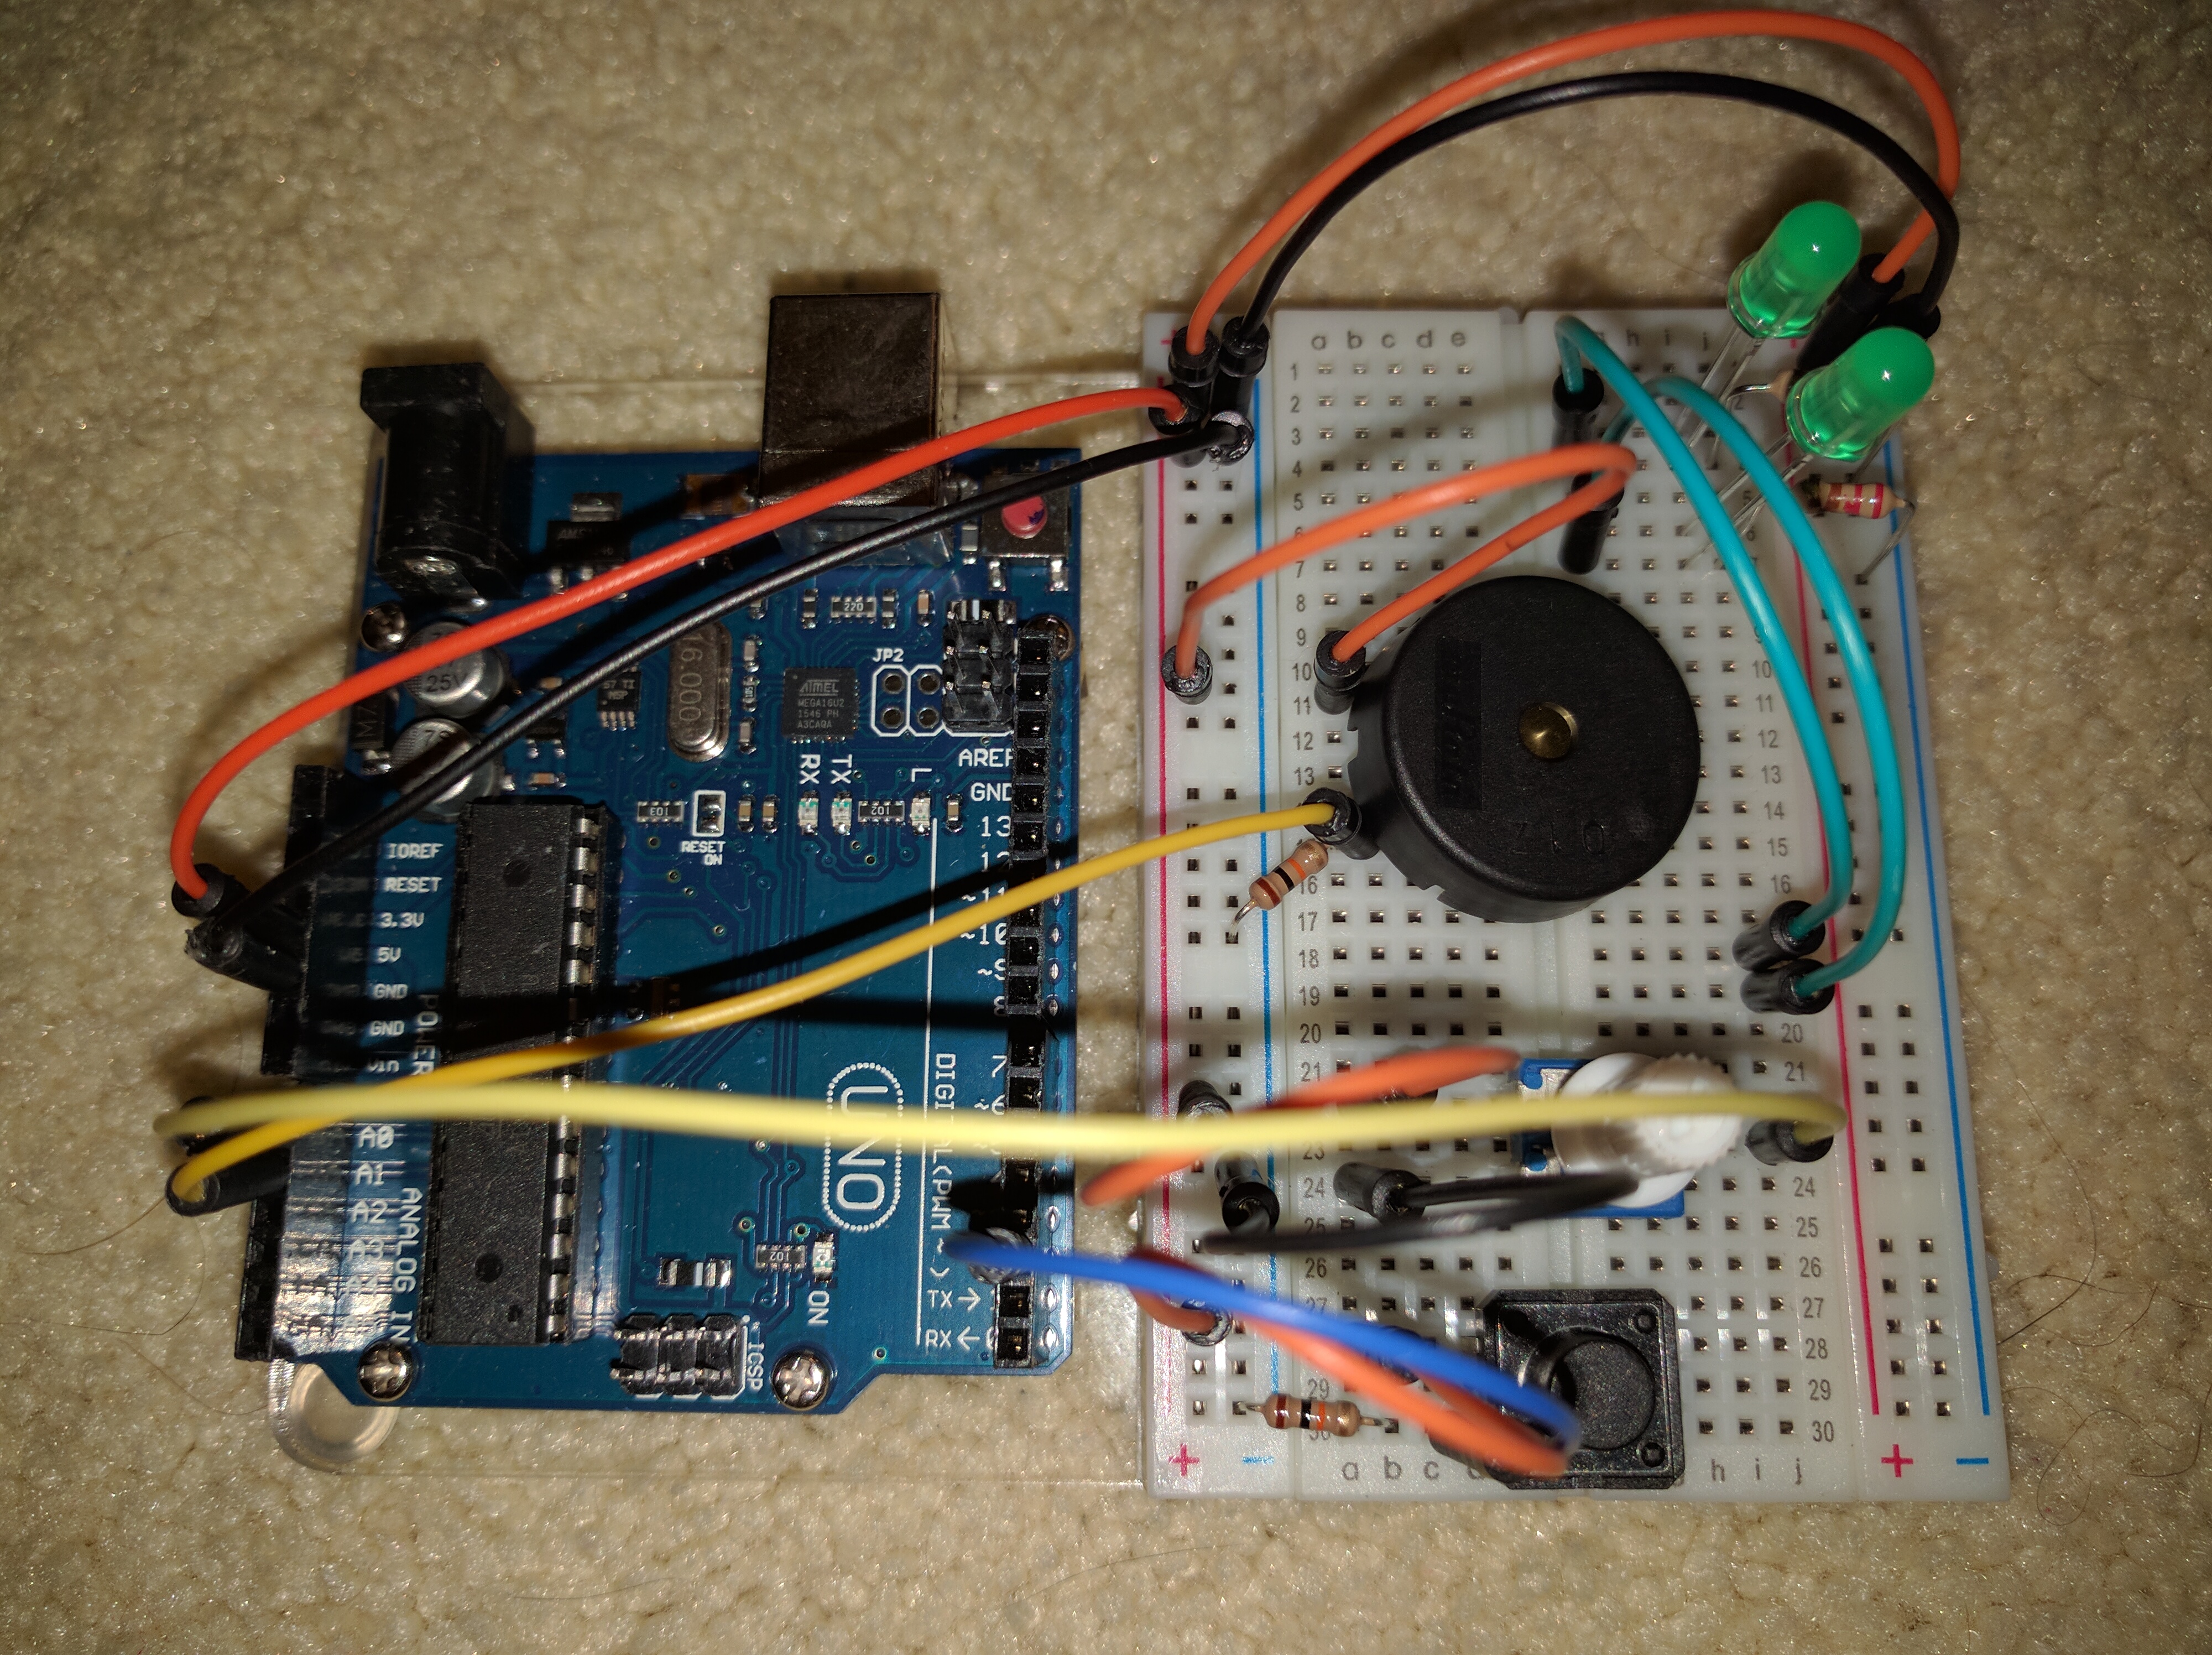
Photos

Video


Leave a Reply